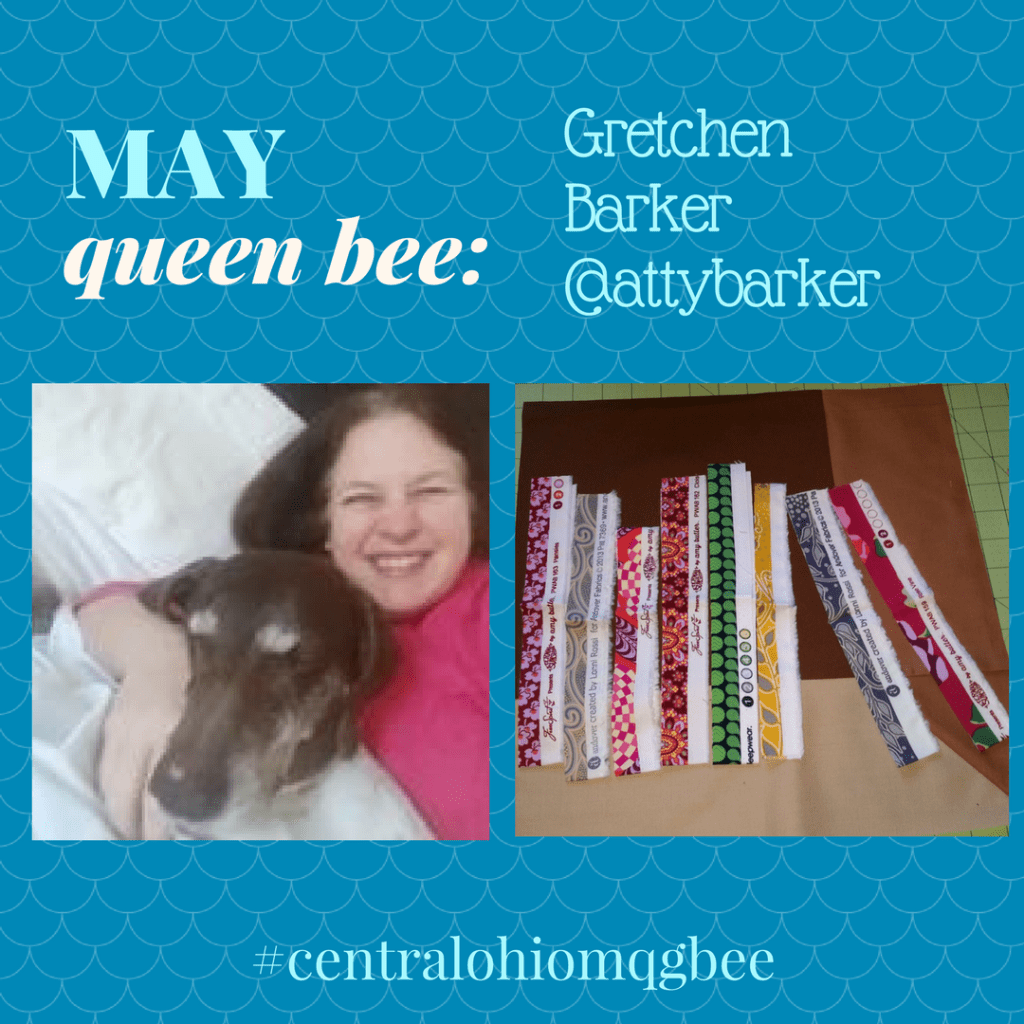
Our Queen Bee for May 2017 is Gretchen Barker! (IG: @attybarker) Please complete her block as soon as possible and have it ready at the May 2017 meeting.
Need a Quilt Bee refresher? Start with the 2017 Modern Quilt Bee Megapost.
Instagram: @attybarker
Block:
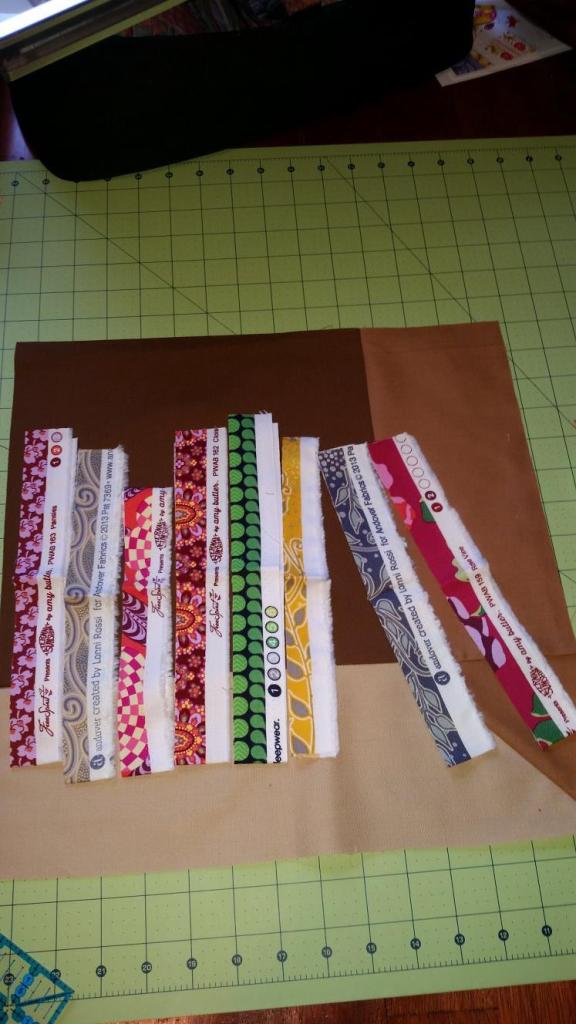
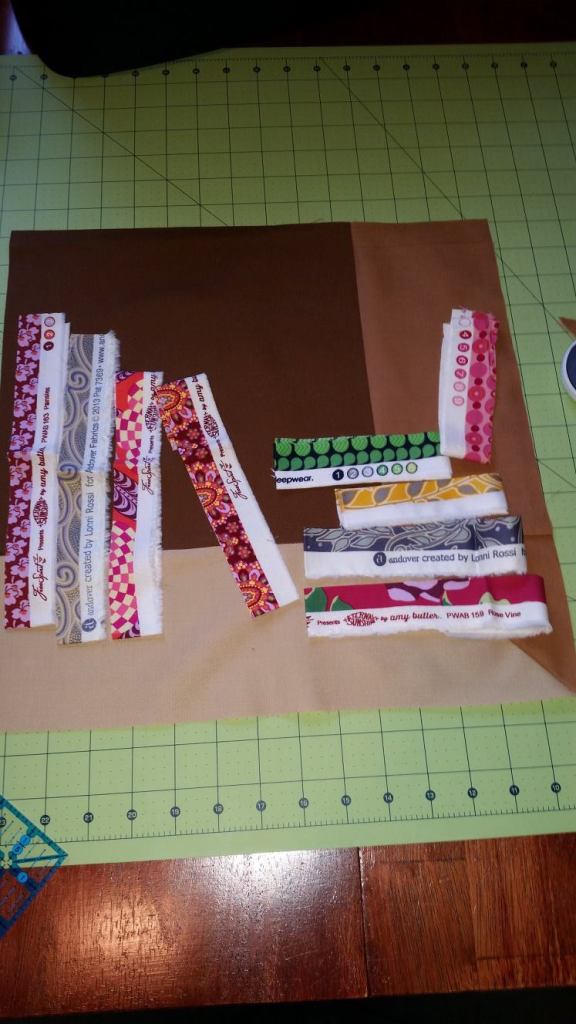
perspective selvage bookcase
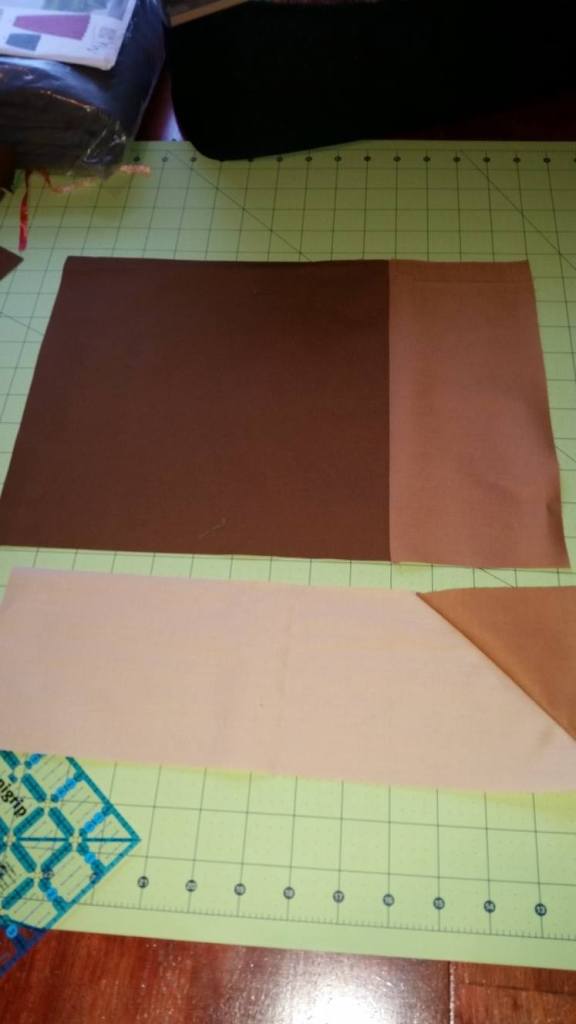
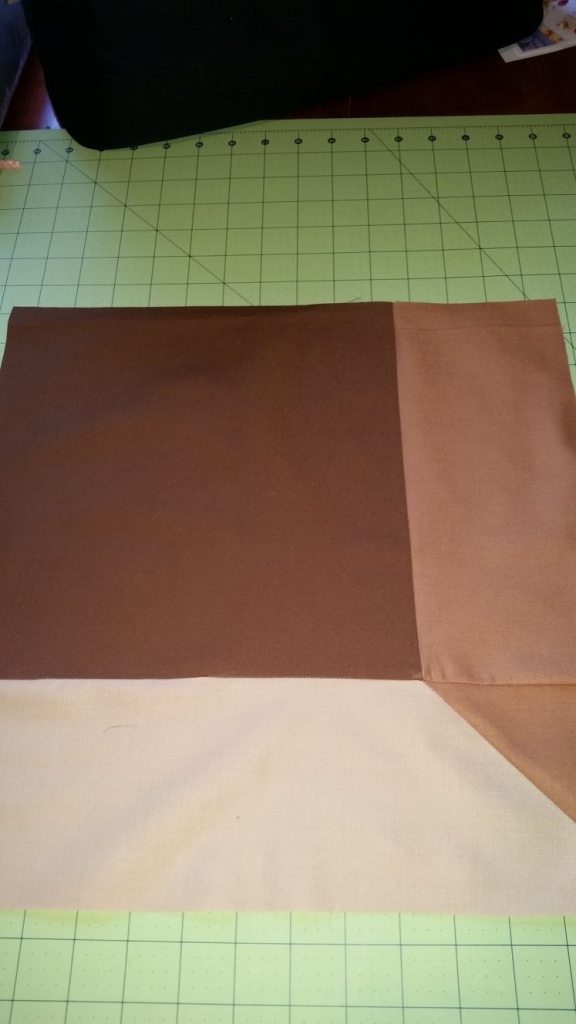
Brown fabric for the shelf was handed out at the meeting. Email or message Gretchen if you need to get in touch to receive fabric. You need to supply the selvages.
- This is the month’s bee block. I’m providing the brown fabrics for the shelf.
It’s a bookshelf (cubby-style). Stitch & flip to create the “perspective” corner, but otherwise the shelf is straight piecing. Light fabric is bottom shelf, dark is back of the shelf, medium is the right side “divider” between your cubby and whoever’s cubby turns up next to yours. Use your own selvages & imagination to improvise on how to place the “books”.
- After piecing the cubby shelf, applique the books onto the shelf.
selvages have one side “finished” and one raw. Either turn under (stitch & flip) the raw edge or hide them by just putting the finished selvage edge of the one next to it on top of it…. remember to put the books on the floor of the shelf and or leaning up against the side, not hanging on the back & not “floating.”
You can EITHER turn under the raw edge (by the applique method of turning under OR by stitching & flipping it) OR you can hide the raw edge of one under the finished edge of the one next to it. The ends are not such a problem… but you can turn them under if they feel like they’ll fray. Remember that the selvage side starts to get dense, which is intended to KEEP that part from fraying, so the only real issue is with the small part that goes past that edge, and this tiny amount of raw edge can be finished like any raw-edge applique… stitch close to the edge OR zigzag over it if you feel it will hold better.
PART of the reason the examples I have are not as realistic as they could be is that I was just laying them on top of the fabric, not finishing them just yet, so I did NOT have them tacked on top of each other… it’s the spaces in between that really make them look unrealistic, like they’re floating. You’ll see when you put them together, it looks much better when they’re NOT floating.
Heck, if someone wants to get REALLY creative and use a bookend of paperweight, great… have fun with the improv part of this project! And feel free to call/e-mail/reply to this post with questions!

Leave a comment